Showing posts with label tutorial. Show all posts

Thursday, January 17, 2013

Repurposing the Ubiquitous Altoids Tin

 Remember when I demonstrated how to fold an vast amount of bias tape quickly? Well, if you've started making lots of it and have it coming out your ears like some woman I know, you might be wondering just how to keep it from becoming a tangled mess.

The obvious answer is "wrap it around something. But what?
A piece of cardboard, like commercial bias tape is packaged, leaves those obnoxious creases in your special bias tape. This is why I don't use a flat piece of cardboard.

A cardboard tube such as is I the center of a roll of paper towels (or toilet paper) works much better, but it's garbage day, and the recycling has already been picked up, so I needed something better. Enter the ubiquitous Altoids tin. I can never seem to toss them in the recycling bin, they're just so handy! So, there's usually an empty one floating around my house.

I simply inserted one end into the tin, closed it, and wound the bias tape around it, then secured with a pin.


Easy Peasy


I like that it isn't going to crease my hard-earned bias tape, and I like that I can stack them in my sewing closet a little better than rolls around tubes. Alright, I admit I also like it because it's an excuse to expanding my Altoids tin collection.

Happy sewing!

Wednesday, January 16, 2013

Folding 5 yards of bias tape, in 10 minutes.

Try It Tuesday


So you've taken the fabric you picked to make your own homemade bias tape and turned it into a parallelogram of doom. You've marked it, folded and pinned it so that the first marked strip pins to the second and so on. You've pinned it, lost hope and stitched it anyway, all the while grateful you decided to try it with a fat quarter instead of larger yardage. You took your twisty wonky mess to your sewing machine, stitched skeptically, then used your good shears to cut out one bit continuous string of fabric, on bias.
That's a triumphant place to be, but also a daunting one. If you're like me and cut those strips at 2", suddenly you have just over 5 yards of bias tape, and therefore a LOT of edges to turn under and press.
Yeah, major time suck.
Well, I don't believe in time suck, so here's what you do to quickly turn that strip of bias tape into something functional.
Get TWO long needles and a ruler. Decide just how wide you want your bias tape to be when both edges are turned. I went with an inch.
Take your pins and put them, about 2" apart so they go through your ironong board cover and back up, then through and up again, so that the space created in the middle of each needle, over the ironing board, is your desired distance, in this case, 1". do it with both needles, 2" apart. It sounds complicated, but it really isn't.
Now hand turn the edges at one end of your bias strip and feed it through the needles. Pull it out about six inches, slowly, and press this section. It's "the hard part."
Now, your can take the ironed end of your folded bias tape and just pull the rest through, under your iron.
You'll want to move your iron around a little so you don't scorch your ironing board.
If the bias tape starts feeding unevenly, just stand up your iron, manually readjust the fold a few inches away from the needles, and start up again. I find I have to readjust about ever 2 or three feet, but it's not a big deal, and still so much faster than painstakingly folding down one edge, and vastly superior to spending money on one of those "bias tape maker" contraptions. It's a free modifiable bias tape maker that you didn't even know you already owned. Pretty cool, huh?


Tuesday, July 05, 2011

Tutorial Tuesday: Rosette Hair Clip

I found myself behind the other day.  I needed a gift for a teenage girl, and I needed a gift in less than 20 minutes. Solution? A frayed rosette hair clip.  I apologize for the quality of the pictures, but like I said, I had about 20 minutes, and I didn't want to miss the opportunity to share what I was doing with you.

Pretty, isn't it?

Materials:
Fabric Rosette (I'll write up that tutorial for you too.)
Green felt
Alligator Clip
Scissors
Hot Glue gun with glue sticks


Step 1: Plug in hot glue gun. Make sure it has something under the tip to catch the drips. 
Step 2: Using scissors, cut out a leafy shape from the green felt at least as long as the alligator clip.
Step 3: Pinch the end of the alligator clip so it opens. Apply hot glue to top side of it (the side with the bend) and with it still open, gently apply the leaf and press into place, still holding it open.  Hold this way long enough to sing the Alphabet song.
Be sure to cover the entire length of the alligator clip.
(the funky paper is there to catch drips, and yes, it's scrap paper)  I found it easiest to hold the piece upsidedown to apply pressure to both the opening mechanism and the leaf while taking a picture.


Step 4: Apply glue to the top of the leaf in a straight line approximately the size of the flower that is going to go on top.

Step 5: Press rosette into glue and hold there long enough to sing a round of The Song that Never Ends.

Step 6: Unplug hot glue gun and put away materials.

Step 7: Look at the clock and be proud of yourself.

Note: I'd much rather have glued this together with E-6000, but it's really stinky and I didn't have that long to let things dry.  However, it is a better adhesive, if you have time.

Tuesday, June 21, 2011

Tutorial Tuesday: Pillow Case

I like making pillow cases. They're quick, easy, and a great way to add some interest to your bed, or to lug your laundry home from a week camping.
Pillow cases make me happy.
Because I heart pillow cases so much, when I made my nephew a blanket for his birthday, I decided to make him a coordinating pillow case too. 
 I keep thinking that I need to make a set of three matching pillows for our bed, one for myself, one for spouse, and one for the JabberWalky, since we co-sleep.

About this pattern/tutorial:
This pattern makes a Standard sized pillow case.  The method can be adapted for other sizes of pillow, however, I have not yet crunched the numbers, and it would not be as elegant as a simple "one yard." And since I'm putting this pattern out there for free, I'm too lazy to do the other figures right now.
This design leaves no exposed raw edges by using French Seams. They're not complicated, and I explain the process, but you can be proud of yourself for having learned how to do them when you're finished.
Have fun, feel free to play with fabrics, and look forward to seeing variations posted in the future.


For a How-To on how to make the child sized blanket, see my Blanket Tutorial.


Materials:
1 yard quilting cotton
2" to 4" strip contrasting fabric
Matching or delightfully contrasting thread

Tools:
Sewing Machine
Iron and Ironing Board
Scissors
Rotary cutting mat
Rotary cutting ruler
Rotary cutter

Step 1:  Pick out your fabric.  This may take months, it's okay.


Step 2: Wash, dry, and iron fabric. This is crucial to having a long lasting finished item that doesn't look like it was sewn by the cat.


Step 3: Cut a 9" strip of fabric from your one yard piece from selvage to selvage. You will now have two rectangles. One 27"x 42"-44", and another 9"x 42"-44"

Step 4:  With Right Sides Together, pin contrasting fabric to the larger piece of your main fabric.  Stitch together with a 1/4" seam allowance, remembering to backstitch at beginning and end.  Remove pins, press seams flat toward contrasting strip.


Step 5: With Right Sides Together, pin 9"x 42"-44" strip of main fabric to the contrast fabric. Stitch together with a 1/4" seam allowance, remembering to backstitch, backstitch, backstitch.  Remove pins. Press seams open.


Step 6: Fold over and press a 1/2" hem along edge of smaller section of main body. Stitch in place


Step 7: With WRONG sides together, carefully fold down hem so that it completely overlaps the contrasting strip, aligning the seam lines. ( I skipped sewing in my hemline as it's a redundant step, but if you're nervous about alignments, it's a good idea)


Step 8: Pin in place sparingly, flip over, and slowly stitch along the seam between the contrasting strip and the main body.


Step 9: With WRONG Sides Together, pretty side OUT, fold "hotdog style" so that you have a rectangle approximately 22" x  38" (Approximately because fabric widths vary and the width of the contrasting stripe can vary per your preference.)  Pin the long edge and the edge furthest from the contrasting stripe, leaving the hemmed area unpinned.


Step 10: Using a 1/4" seam allowance, sew far and long edges, remembering to backstitch. Pretty side still out.

Step 11: Turn inside out and iron seams so it all lays down nicely.  Now it is Right Sides Together. Pin  along the long side and the far side, so you don't get confused about where you're sewing.


Step 12: Using a 1/2" seam allowance, stitch the long and far sides.  Remember to backstitch where you start and stop. Clip loose threads.

You've just learned how to sew a French seam.  Pat yourself on the back.

Step 13: Turn right side out and enjoy


GREEN TIP*If you are making a pillow case and blanket as a gift, I say fold the blanket neatly and wrap it in the pillow case.  It's cute, efficient, and saves wrapping supplies!

Sunday, June 19, 2011

Tutorial: Toddler Blanket

This year for my nephew's birthday, I decided to make him a blanket and matching pillow case.
 I made blankets for all of my parents' other grandkids for Christmas, and a couple of their half-siblings, so it was time to make sure the latest toddler on the list had a blankey too.
For toddlers, small children, and people who like a light weight blanket while watching tv, I like to make them either 42"x60" or 42" x 72".  42"x72" is what my great-grandma called "bunk size," and was about the size she made all her quilts for children, since they didn't need them hangin' off the bed and makin' a mess.  She sold quilts by the side of the road and pieced ones for her own family from the scraps from the ones she'd sell.  To make a baby blanket I would reduce the size to 42" x 36" or use the same size, because I'm a big fan of borrowing my kids' baby blankets when I'm watching Doctor Who.
(note- finished blanket sizes are closer to 41"x59" or 41"x71")

What you need:
 Fabric-
2 yards quilting cotton, 2 yards Minky. (If you want to make the blanket only 60" long, you can get away with only using 1 1/3 to 1 1/2 yards of Minky, as it is 60" wide)

Thread- matching or complimentary to your fabrics
Iron
Ironing Board
Scissors,
Pins
Either Measuring tape or cutting board and rotary cutter with rotary cutting ruler.  I highly recommend  using rotary cutting methods as I'm awful with scissors.
Sewing Machine
Bobbin
Extra needles for your machine.  If you don't have at least one, go procure one before starting any new project.

How to make the blanket:

Step 1:  Pick the fabrics that are going to make your heart sing. Then Wash and Iron the quilting cotton.
Step 2: Straighten your work area, double checking that you have all the supplies you'll need.
Step 3: Thread your machine and test your stitches and tension on a scrap of fabric.
Step 4: Cut  quilting cotton fabric to your desired size, taking care to cut straight lines at 90 degree angles.  Note- This is fairly easy if you are cutting for a 42" x 72" size blanket and you've bought exact amounts from a supplier who takes great care in their cutting of yardage, as your quilting cotton will already be the right size and you can trim your minky to match in Step 7. Because I didn't use exact yardages, I had to cut mine, and I used my rotary cutter to trim it to length.


Step 5: Lay fabrics flat  and smooth on top of one another, right sides together. (This is easier said than done. In order to keep the Minky smooth you need to have some amount of friction with it, so I usually lay it on a bed, carpet, or on top of an acrylic afghan to keep it from slip-sliding around.  Some people prefer to lay the cotton down first to act as the gripping agent.)

Static clingy afghan of goodness.

Step 6: Pin edges all of the way around.  At this point you have to decide where you want the opening to turn the blanket.  I usually place it about 10" from a corner, and use the length of my hand as a guide.

I mark the extremes of this area by double pinning at each end so I'll know where to stop and start stitching.  (This is a good time to cut the Minky layer if you still need to)
Step 7: Trim excess Minky away.

Step 8: Begin stitching at the first set of doubled pins and stitch around the entire blanket.  I usually use between a 1/4" and 1/2" seam allowance.  Always backstitch when beginning or finishing a line of stitches.  When I am a seam allowance's length from the end of a side, I lower my needle through the fabric, raise the foot, and turn the fabric. Then I lower the foot again and continue stitching so as to not have to start a new seam.  At the second set of double pins, backstitch, remove from machine, and clip loose ends.


Step 9: Remove all those pins.
Step 10: Turn rightside out. I generally worm my whole arm into it and grasp the far corner, then pull it out first.

This is the fun part.
Step 11: See that open area? Time to handle that.
Take the whole mess and the pins back to the open area where you first pinned it and  carefully arrange the blanket so it lays flat with all of the seams nicely open.  This takes patience. You can iron the seams in place if you like, but use a low temperature, as the Minky is synthetic and can melt.
Step 12: Pin the edges so that the nice seams you've just lined up don't move around. Be sure to carefully turn in the open section and pin this area more densely than the rest of the blanket, again marking the starting and ending points of the opening with doubled pins.
Step 13: Starting with the opening, stitch all around the entire blanket, remembering to backstitch at the end as before, turning at the corners.

Step 14: Remove all pins except the doubled pins.
Step 15: Gently pull back the seam between the double pins to make sure that it is properly closed and there are no exposed raw edges.  If necessary, run a second seam between the doubled pins nearer the edge to make sure to enclose any raw edges, backstitching at the beginning and end.
Step 16: Trim all loose ends
Step 17: Take pictures so you can show off your spiffy cuddly new blanket masterpiece.

This is anotherI've made using that technique:

Ta-Da!

Tuesday, March 08, 2011

Tutorial Tuesday: Recycled Shipping Boxes

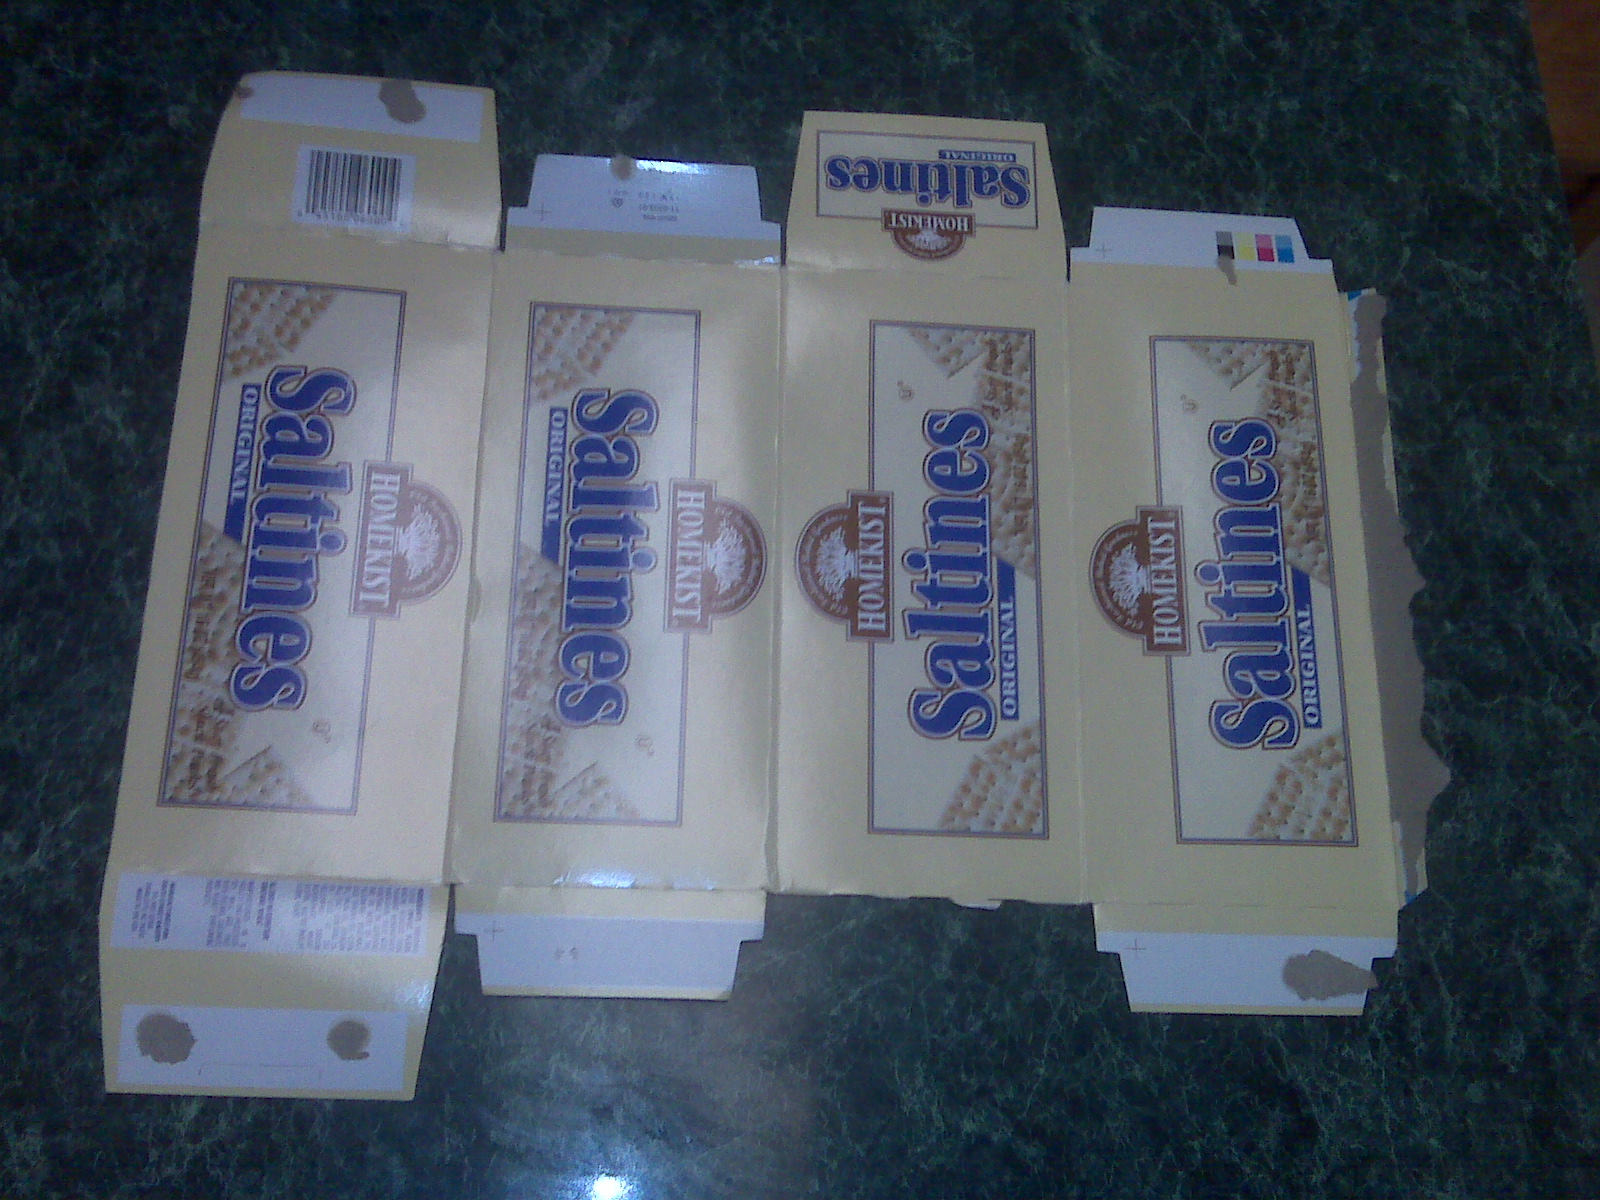
Most of the time, if I'm mailing something smaller than a breadbox, it is going in a cracker box.
I used to just wrap in a paper grocery sack and roll on, but I don't like wasting the materials, and I don't appreciate the added weight. I have to pay to ship that added weight, you know.

So instead, my new technique is as follows.

How to turn a cracker box into a mailer.

 Step One:
Select a box.  I like cracker boxes, because we eat a lot of crackers around here. They're nice in soup, and the toddler enjoys having one for each hand. They're also the perfect size for a Raggedy Rebel or Little Punk.
 Step Two:
Find the box's seam.  In this case, it's right by that blue line, about half an inch from the corner edge.
 Step Three:
Carefully deconstruct the box by gently pulling apart all the glued edges.
 Step Three:
Remind yourself that you need tools. (Yes, I do the deconstruction first, because I now carefully break down any box I think will work well to ship something, toaster pastry boxes, cases of pop... anything. The cases of pop will be it's own tutorial, because it's more complicated.)  I use a pair of scissors and a roll of clear packing tape.
 Step Four:
Locate the end of the tape, tape it to your working surface, and let the tape dangle for easy access later. This whole process is just unpleasant if you have to keep hunting the end of your tape.
 Step Five: Locate any places where you've accidentally abused the packaging creating loose bits, and tape those down.  Be sure to burnish the tape after application.

 Step Six:
Locate the long edge you separated earlier.  roughly fold it into place, then use the edge of your work surface to fold it over, reinforcing the new angle of fold.

 Step Seven:
Overlap the edge to be closed, holding the box in the approximate shape you want it and lay down a small piece of tape for the purposes of allignment.
 Step Eight:
Press the box flat so that the edges you're still joining are in the middle, and tape securely. By shape checking first you're sure to not be missing where you want these to overlap when they're flat. If you skip straight to the flat taping, you run a risk of overshooting and having it not make a very proper square afterward.
Don't forget to burnish the tape.
 Step Nine: Fold in short sides of one open end.
 Step Ten:
Overlap long sides of open end and tape closed.
Step Eleven:
Place item in box, now that it is only open from one end.
Step Twelve:
Repeat steps nine and ten on open end.

Step Thirteen:
Address box, be sure to include return address.

Step Fourteen:
Ship

Step Fifteen:
Giggle that you're giving the doll something to read while in transit.  You know, if dolls could read  in the dark.